 Always an Adventure
How to Host a Jekyll Site for Free with DigitalOcean
This post describes how to set up free hosting of your static Jekyll site with DigitalOcean, including automatic updates of the site when new changes are pushed to Git. The quick and simple setup process of configuring DigitalOcean hosting should take around 10-15 minutes.
Background
When I was initially setting up this blog I knew I wanted to use a static site generator such as Jekyll, but I wasn’t sure where to host it. I was hoping that something as simple as a small static site could be hosted for free somewhere, and DigitalOcean came through with an easy solution. I’d heard of DigitalOcean before and always had a positive association with their brand, but this was my first experience actually using it.
What made this easy was DigitalOcean’s App Platform Free Tier, which includes three apps with static sites and up to 1GiB of data transfer for each. It supports custom domains, HTTPS, and deployment from GitHub/GitLab. Perfect for a straightforward site like this one!
Prerequisites
Before getting started, make sure you already have these things set up:
- Jekyll static site that you are able to serve and build locally
- The site is stored in a private repository inside GitHub, GitLab, or Bitbucket
- You’ve bought the domain at which you’d like to host your site
- You have access to modify the domain’s DNS records
- You’ve created a DigitalOcean account
If you haven’t purchased the domain yet, I’d highly recommend Namecheap as they are easy to use, secure, and competitively priced.
For the purposes of this tutorial let’s make these assumptions:
- The blog is named
myawesomeblog - It is in this Git repository:
https://gitlab.com/pinchaque/myawesomeblog - It will be hosted at
myawesomeblog.com
DigitalOcean App Creation
Source Settings
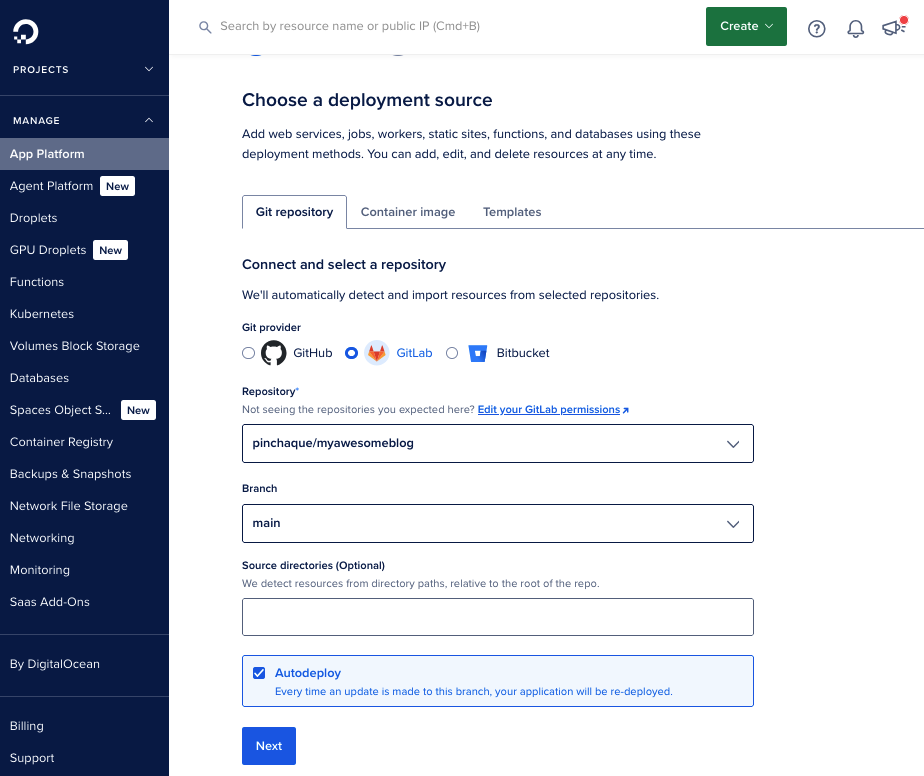
As a first step you will create a new app within the DigitalOcean App Platform. Select “App Platform” in the left navigation and then click the “Create App” button.
Tihs will prompt you to select the deployment source following these steps:
- Connect to your Git provider (e.g.
GitLab), which will require an authentication step. - Select the repository where the site is hosted (e.g.
pinchaque/myawesomeblog). - Select the branch you want to use for deployments, which would typically be
main. This sets you up for a workflow of doing a new deployment whenever new content is merged intomain. - “Source directories” should be set to whereever the Jekyll site is located within that repository. Typically the site is just in the root directory of your repository so you can just leave this empty.
- Make sure “Autodeploy” is checked if you want to automatically deploy new site versions when changes are merged into
main.
Resource Settings
Once you click “Next”, you’ll be taken to a “Review and configure resource settings” page.
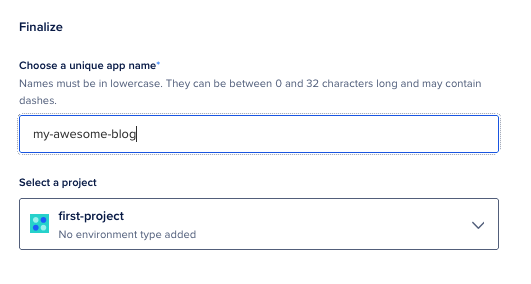
One important thing is buried down the page: naming your app! Scroll down until you find the “Finalize” section and enter the name you’d like.
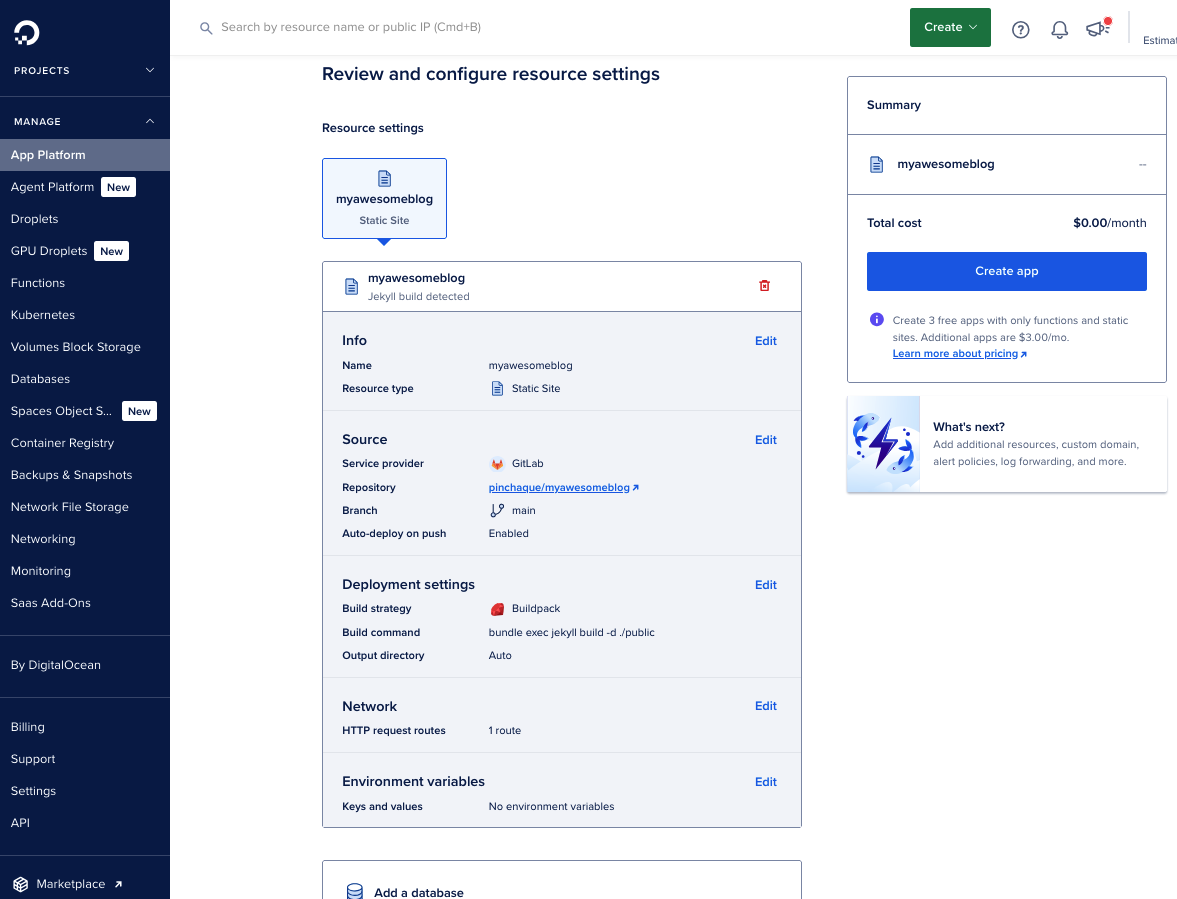
Otherwise, you likely won’t have to adjust anything on this page. It’s worth scrolling back to the top to look at the “Deployment settings” section just in case you have a non-standard Jekyll directory structure.
There you’ll see the command that will be used to build your site, which is bundle exec jekyll build -d ./public by default. This will put the build into the public directory.
Also note that the “Output directory” is set to Auto, which means DigitalOcean will look for your site in a few different places, including that default public directory.
Probably nothing for you to change here unless you have an existing public directory and need to move the build somewhere else.
When you’re done reviewing this page, click “Create app” to proceed.
Initial Deployment

Once the app is created it will immediately attempt a first deployment, whch can take a couple minutes. You’ll see an indicator on the “Activity” tab that the site has gone live, and a link to click to visit the new website. Click through and check it out!
You’ll note that the site is hosted on a DigitalOcean domain (e.g. https://my-awesome-blog-k7zaj.ondigitalocean.app) to start; we’ll add your custom domain next.
Custom Domain Connection
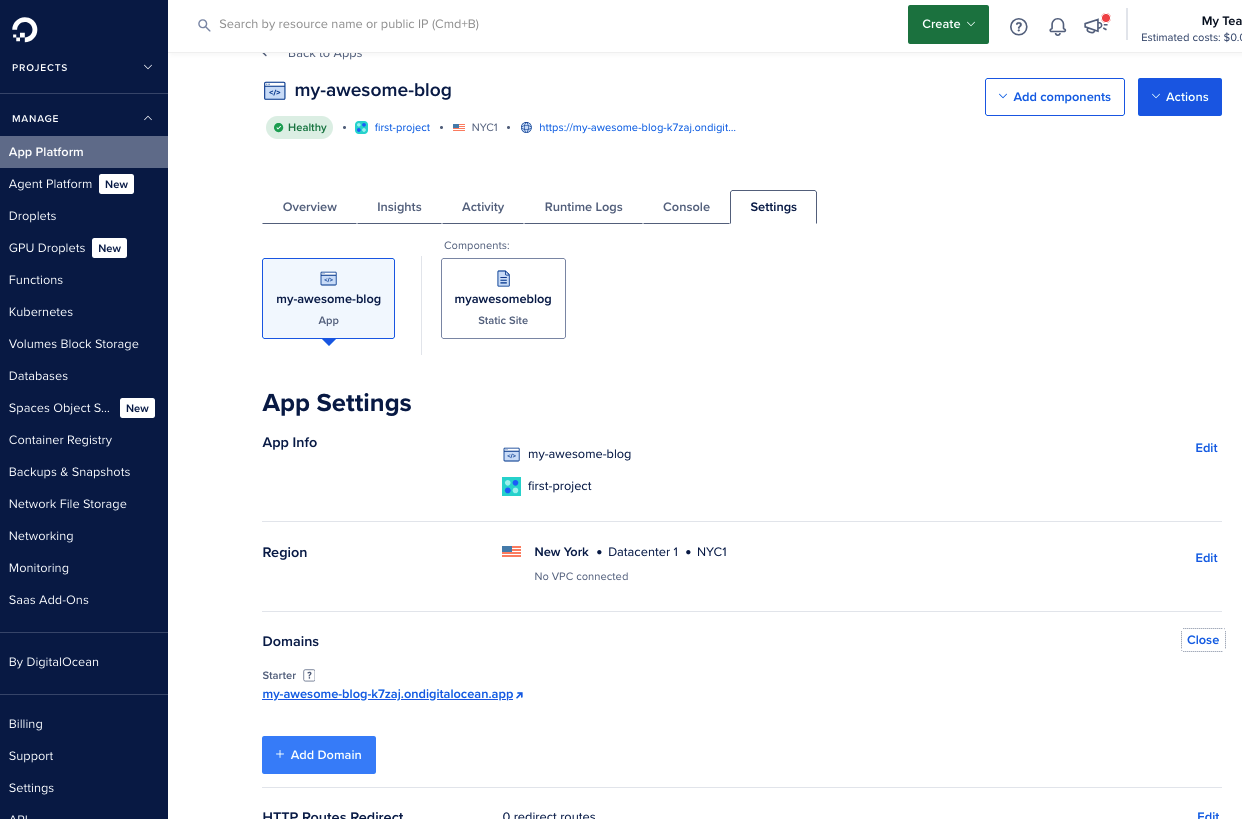
To set up the site on your own domain, first navigate to the “Settings” tab for your app. Click “Edit” on the “Domains” section. you’ll see the starter domain that DigitalOcean provided. Click “Add Domain” to set up your custom domain.
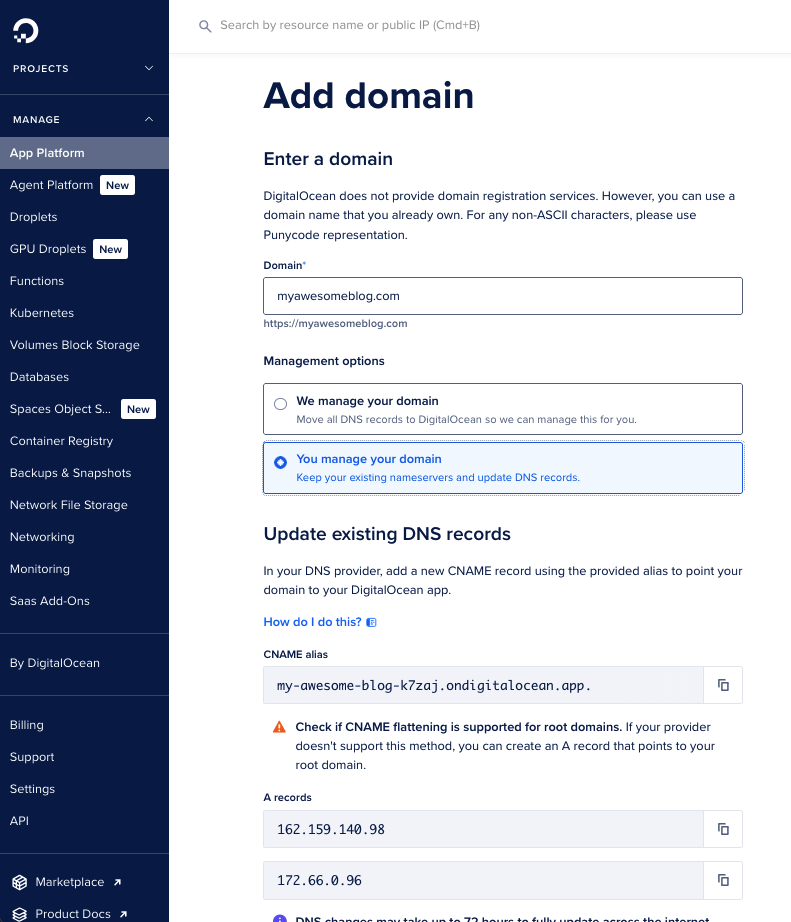
On the next page you’ll enter your domain and get specific instructions on the DNS configuration. You can choose to have DigitalOcean be the DNS provider (“We manage your domain”) or continue with the DNS provider you have (“You manage your domain”). Either way, there is a “How do I do this?” link with more helpful instructions if needed.
Once you set the domain, it will take several minutes for DigitalOcean to fully configure it. It does another deployment and also must set up the SSL certificate. Once it is complete then it will show “Active” under your new domain on that “Settings” tab.
Automatic Updates
The last step I recommend is to verify that new builds will automatically be created and deployed when changes are pushed to Git. To test this, make some simple change to your site (e.g. write “Hello world” in index.markdown), commit it, and push it to the main branch.
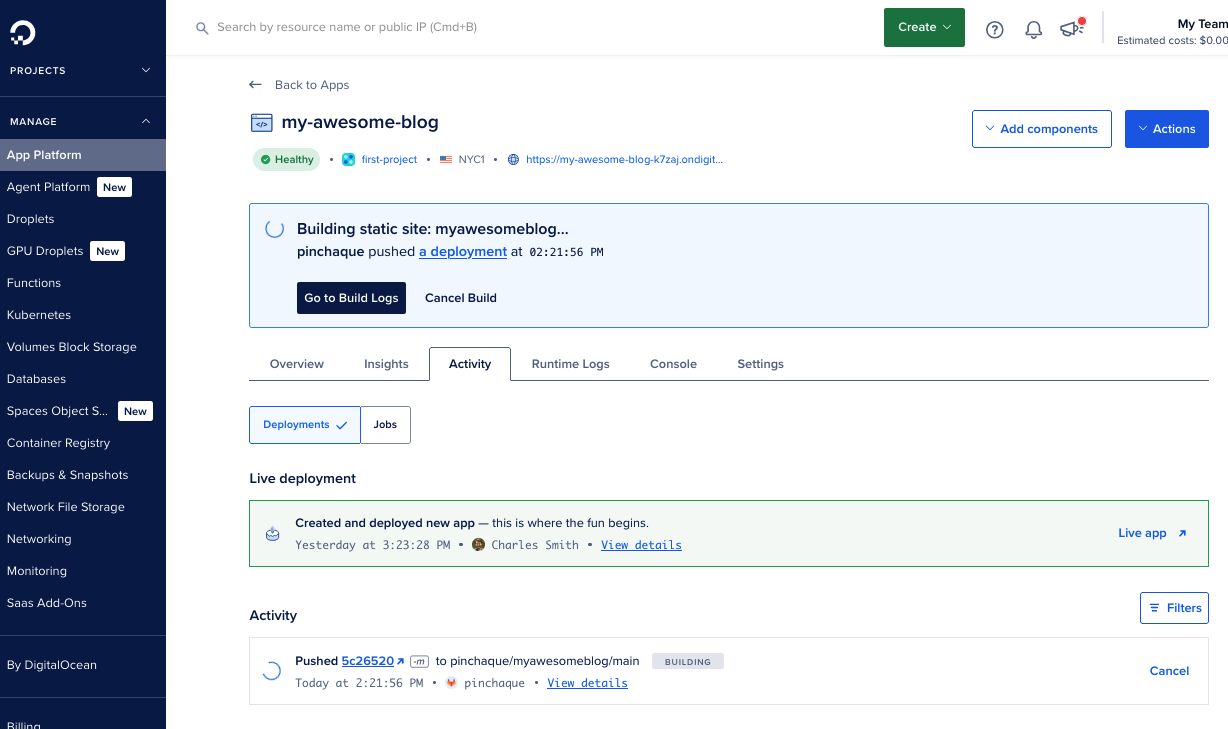
Immediately after you push the change, click on the app’s “Activity” tab within DigialOcean and you should see:
- Banner at the top that starts “Building static site”
- Activity entry at the bottom of the page indicating the commit that was pushed
Then click on the “Go to Build Logs” button to watch the action.
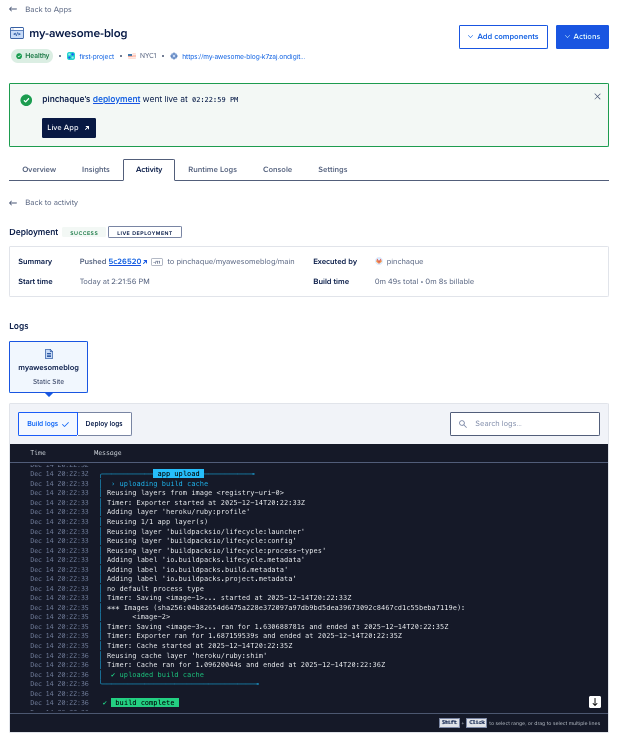
The Build Logs page shows you the various build commands running in the app’s terminal: installing dependencies, building the site, etc. When this process is done (it took less than a minute for the boilerplate Jekyll site) then you’ll see a “Build complete” message. You can then visit the live site on your custom domain to see the change.